Making lemonade: overcoming obstacles
Having just returned from leading a photographic adventure tour, some important issues are fresh in my mind.
First of all, if you are enthusiastic about bringing home pictures to share and cherish, take a backup camera. On the first day of our trip to colonial Mexico, I discovered that my Pentax 35mm SLR (single lens reflex) film camera was nonoperative — this after taking pictures around my garden the week prior and putting in brand-new batteries. But I had taken along my handy, small, digital point-and-shoot, and my pictures prove that obstacles can be conquered. Ultimately, what is important is your vision and expertise and not the particular camera.
With a point-and-shoot camera, you don’t actually see through the lens (as you would with an SLR). The viewfinder is above and often off to one side of the lens, making it difficult to tightly frame your shots. Because my point-and-shoot was digital, I knew I could crop out extraneous stuff when I downloaded the images to my computer, so I framed less tightly, taking shots at a slightly greater distance. If you are using print film, you can frame less tightly and then use a straight edge and mat knife to cut off (crop) some of the picture later.
With the digital camera, you can frame using the LCD screen, on the back of the camera, which does see through the lens, but this has two drawbacks. It uses battery power at an amazing rate, and it’s difficult to see the LCD screen properly in daylight as it’s not bright enough.
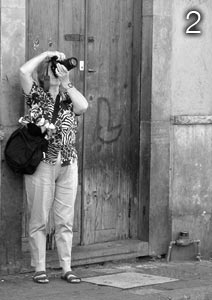
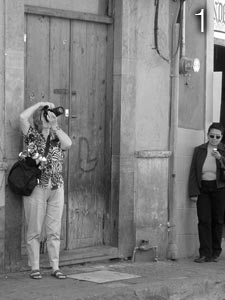
An example of framing less tightly — in taking one picture (see picture No. 1), since I was across the street from Shirley, one of my tour participants, and avoiding traffic, with the fairly wide-angle lens and limited zoom on my digital camera I had to include the woman with the cell phone and the electrical box in the frame. On returning home, I cropped these elements to get a nice, clean image of Shirley enjoying street photography (picture No. 2).
Another issue — due to the delayed shutter release of the digital camera, my images were coming out blurry, especially after my morning coffee. Luckily, one of my companions had a small, flexible tripod designed for the smaller camera; it screwed into the hole in the bottom of the body. I just held the tripod with one hand and squeezed the shutter with the other and this effectively eliminated some of the shake.
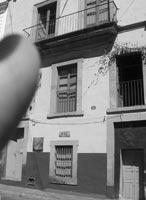
The small tripod also helped to eliminate another annoying problem with small cameras: the “evil digit.” Although my shot (picture No. 3) of a very colorful building is not great, it was ruined entirely by my pointing index finger.
I discovered that if I mounted the camera on this small tripod and held onto the tripod, not only did it reduce camera shake, it prevented my left index finger from intruding into the frame. The tiny tripod can also be propped up on a wall, allowing you to use your camera’s time-release feature to get yourself in the picture.
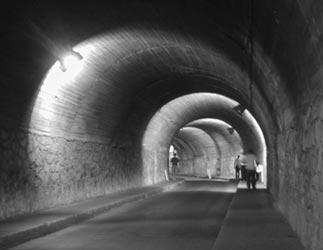
One advantage of my digital point-and-shoot over my Pentax SLR is the ability to hand hold it and shoot at dusk as well as indoors without flash or tripod, due to the sensitivity of the media. To get these shots (pictures 4 and 5), usually I would have to mount my camera on a tripod and shoot at a very slow shutter speed. This can create a significant color shift on film, which seems to be minimal with the digital. Some digitals allow you to change the white-balance setting, giving you even more control over light. There is still the issue of movement, however, as the digital slows down to get the picture.
Another obvious advantage is the small viewing screen in the back. You can check to see if you need to retake the picture because an object has intruded into the frame or you need to use the flash or steady the camera more.
So tuck that backup point-and-shoot into your bag and don’t be discouraged. Review my November ’05 column for creative ideas, and come home with pictures you will want to frame and display. Have fun!
—Better Travel Photography is written by Janet M. Denninger, a photography tour operator.


